Using docker-compose to serve a superintendent interface to many users
The documentation already shows how distributed labelling using a SQL database
to distribute the data can be used pretty effectively (see
:doc:../../distributing-labelling).
However, setting up a database can be difficult; and although even for hundreds of labellers even a small database instance would suffice, there will be some costs associated with it in the cloud.
However, more and more organisations have docker
running on a server; and even if your organisation does not have their own
hardware or runs docker in the cloud, all of the popular cloud providers offer
docker (and, in particular, docker-compose) as a service.
This means it becomes relatively easy for you to manage a database as a back-end, a jupyter server as a front-end, and a model-training server to support active learning.
docker-compose
Docker-compose allows you to specify “multi-container” (i.e. multi-machine) applications that you can then all start and stop at the same time.
You should make sure you have docker and docker-compose installed before continuing.
Here, we are going to start four machines, and the configuration file will look like this:
version: '3.1'

services:

  db:
    image: postgres
    restart: always
    environment: &environment
      POSTGRES_USER: superintendent
      POSTGRES_PASSWORD: superintendent
      POSTGRES_DB: labelling
      PGDATA: /data/postgres
    volumes:
      - "postgres-data:/data/postgres"
    ports:
      - 5432:5432

  adminer:
    image: adminer
    restart: always
    ports:
      - 8080:8080

  orchestrator:
    build:
      context: .
      dockerfile: tensorflow.Dockerfile
    restart: always
    depends_on:
      - "db"
    environment: *environment
    entrypoint: python /app/orchestrate.py
    volumes:
      - ./orchestrate.py:/app/orchestrate.py

  notebook:
    build:
      context: .
      dockerfile: voila.Dockerfile
    restart: always
    depends_on:
      - "db"
    environment: *environment
    volumes:
      - ./voila-interface.py:/home/anaconda/app/app.py
    ports:
      - 8866:8866

volumes:
  postgres-data:
Let’s go through each item.
db
The database server. This will use an official (PostgreSQL)[https://www.postgresql.org/] docker image. You can see that we are providing a “volume”, meaning all the data inside the database is stored in the directory
./postgres-data.Note
The username / password here are just as examples; and you should use some randomly generated strings for safety.
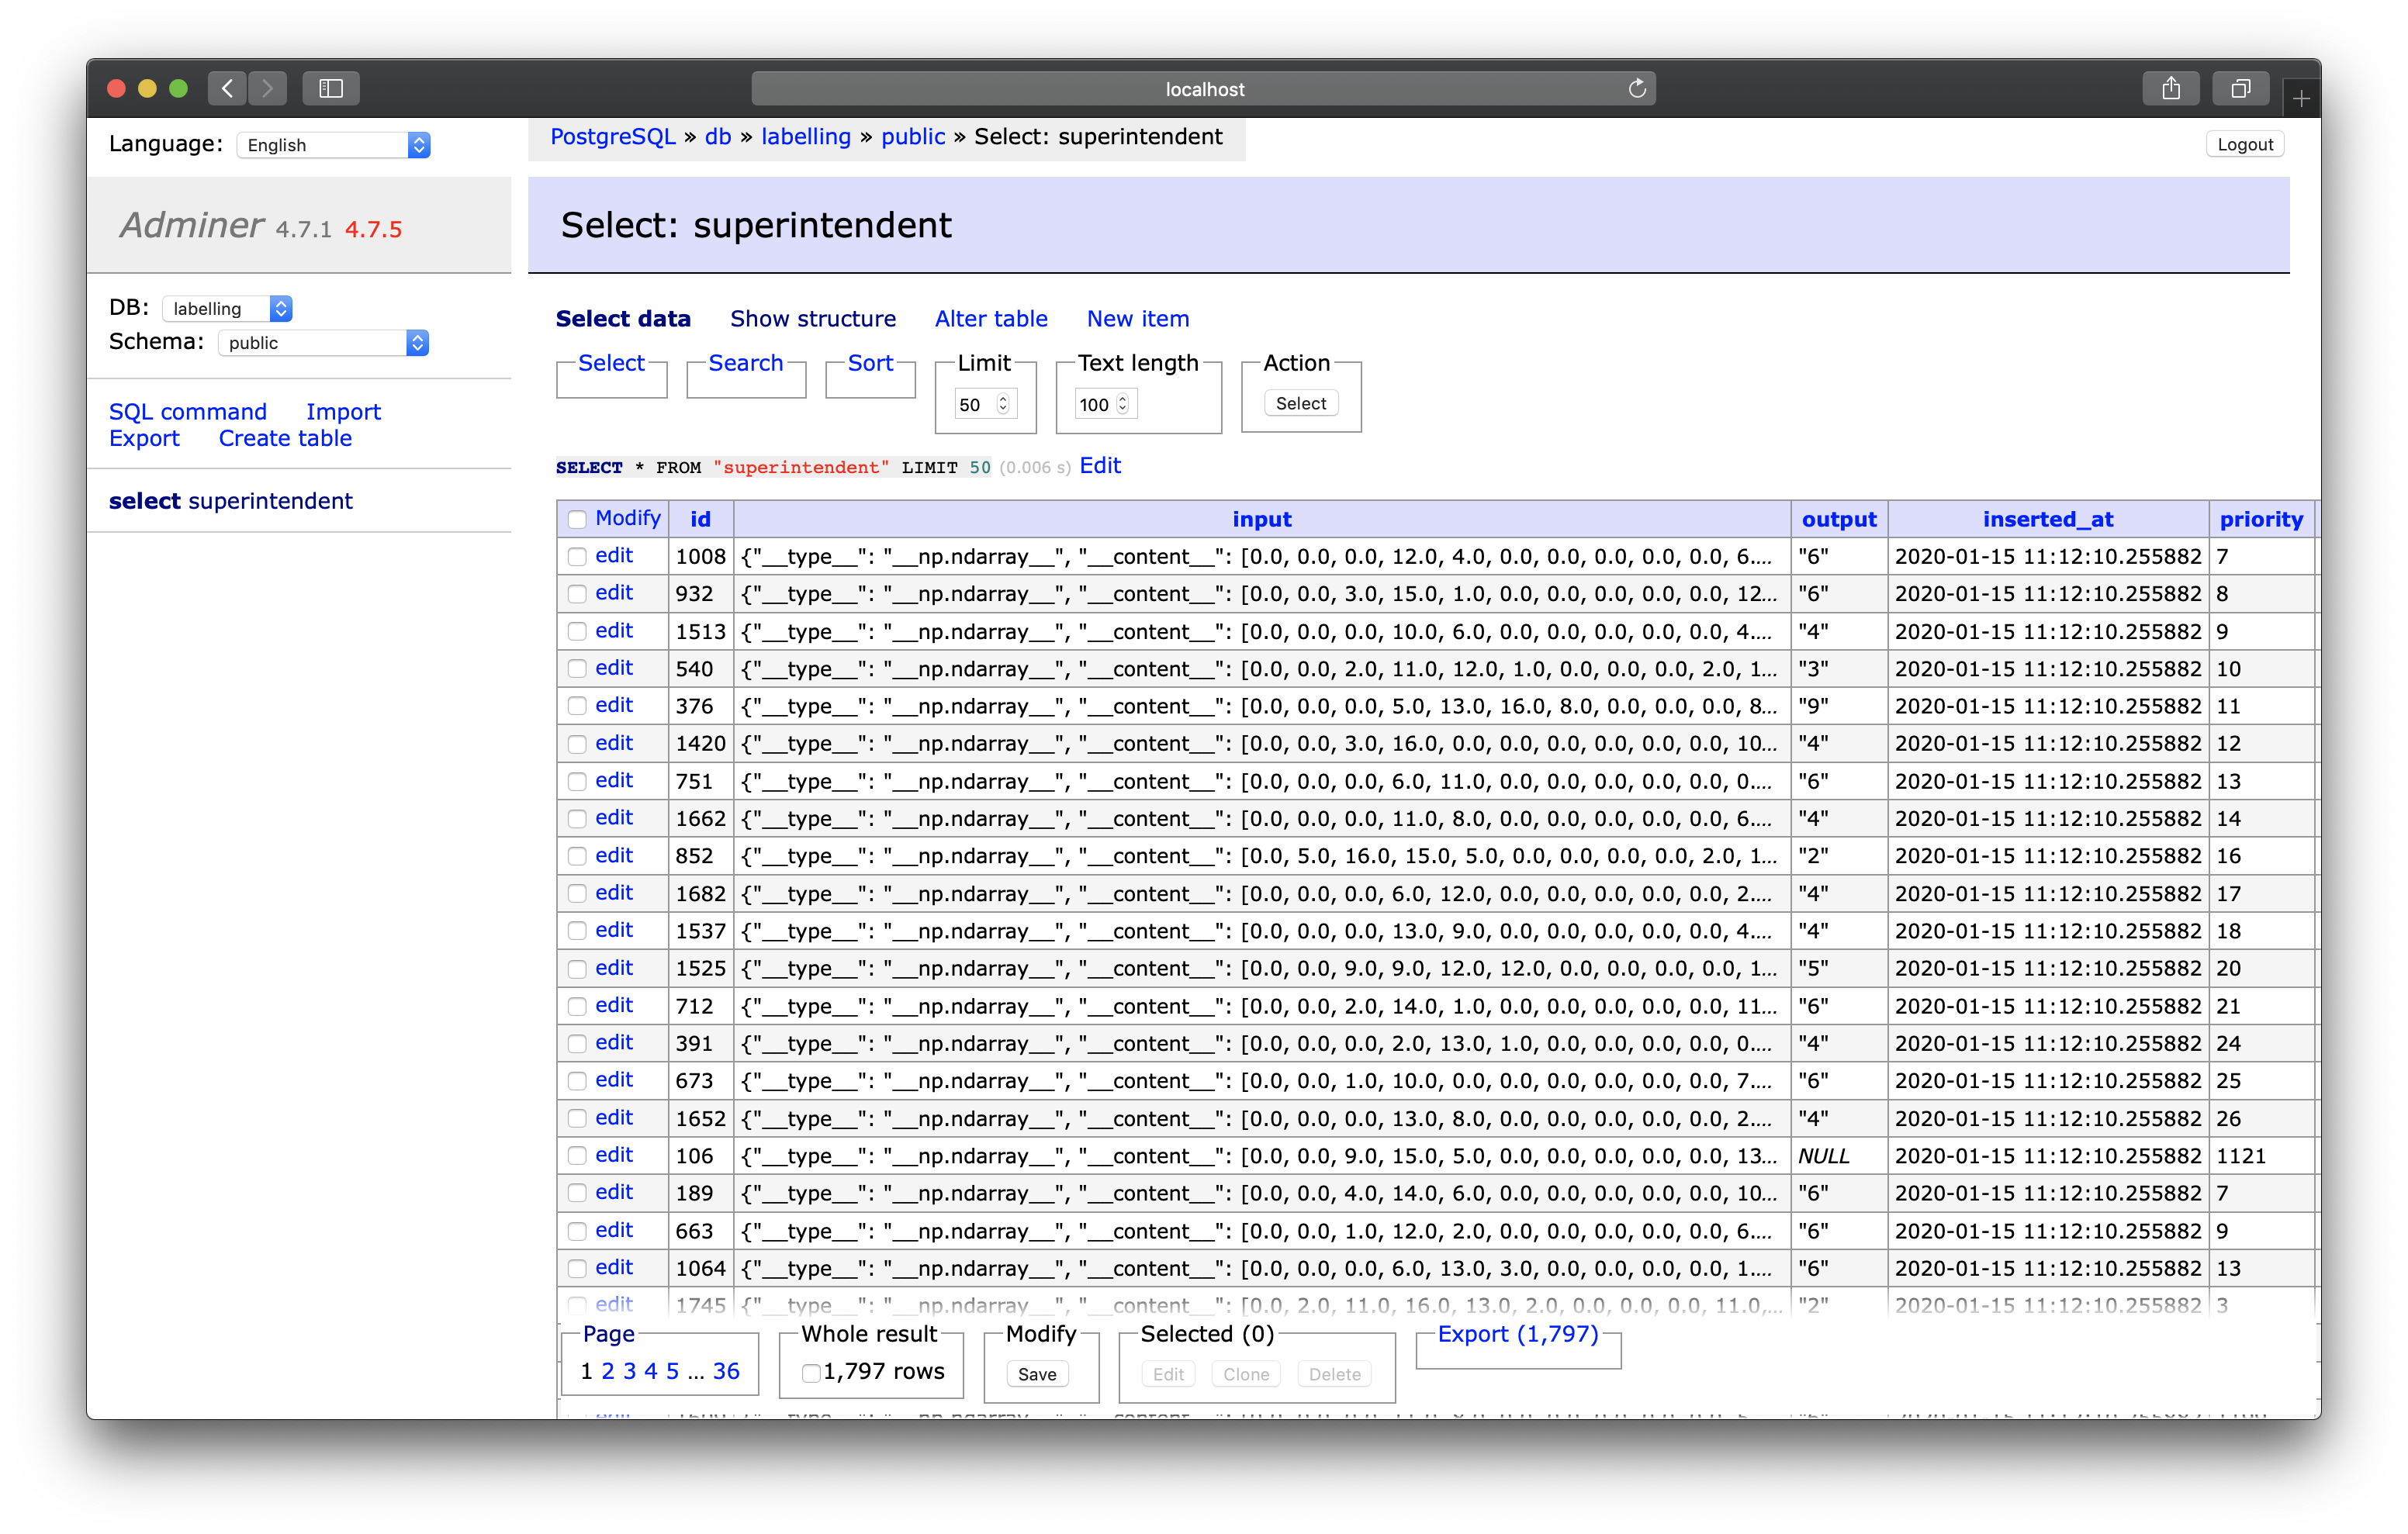
adminer
this is purely to be able to have a graphical interface to the database.
notebook:
This is the server that will actually server our notebook as a website. It uses an image called voila - which actually doesn’t exist yet; we will create that soon.
Note that we’re placing a notebook into the home folder; this means the container will know what to serve
Note also that we’re giving this server the same environment variables as the databse server (which we captures using
&environment)orchestrator
This server will run an orchestration script (which we are mounting as a volume) that will re-train and re-order the data in the database.
The notebook (our webapp)
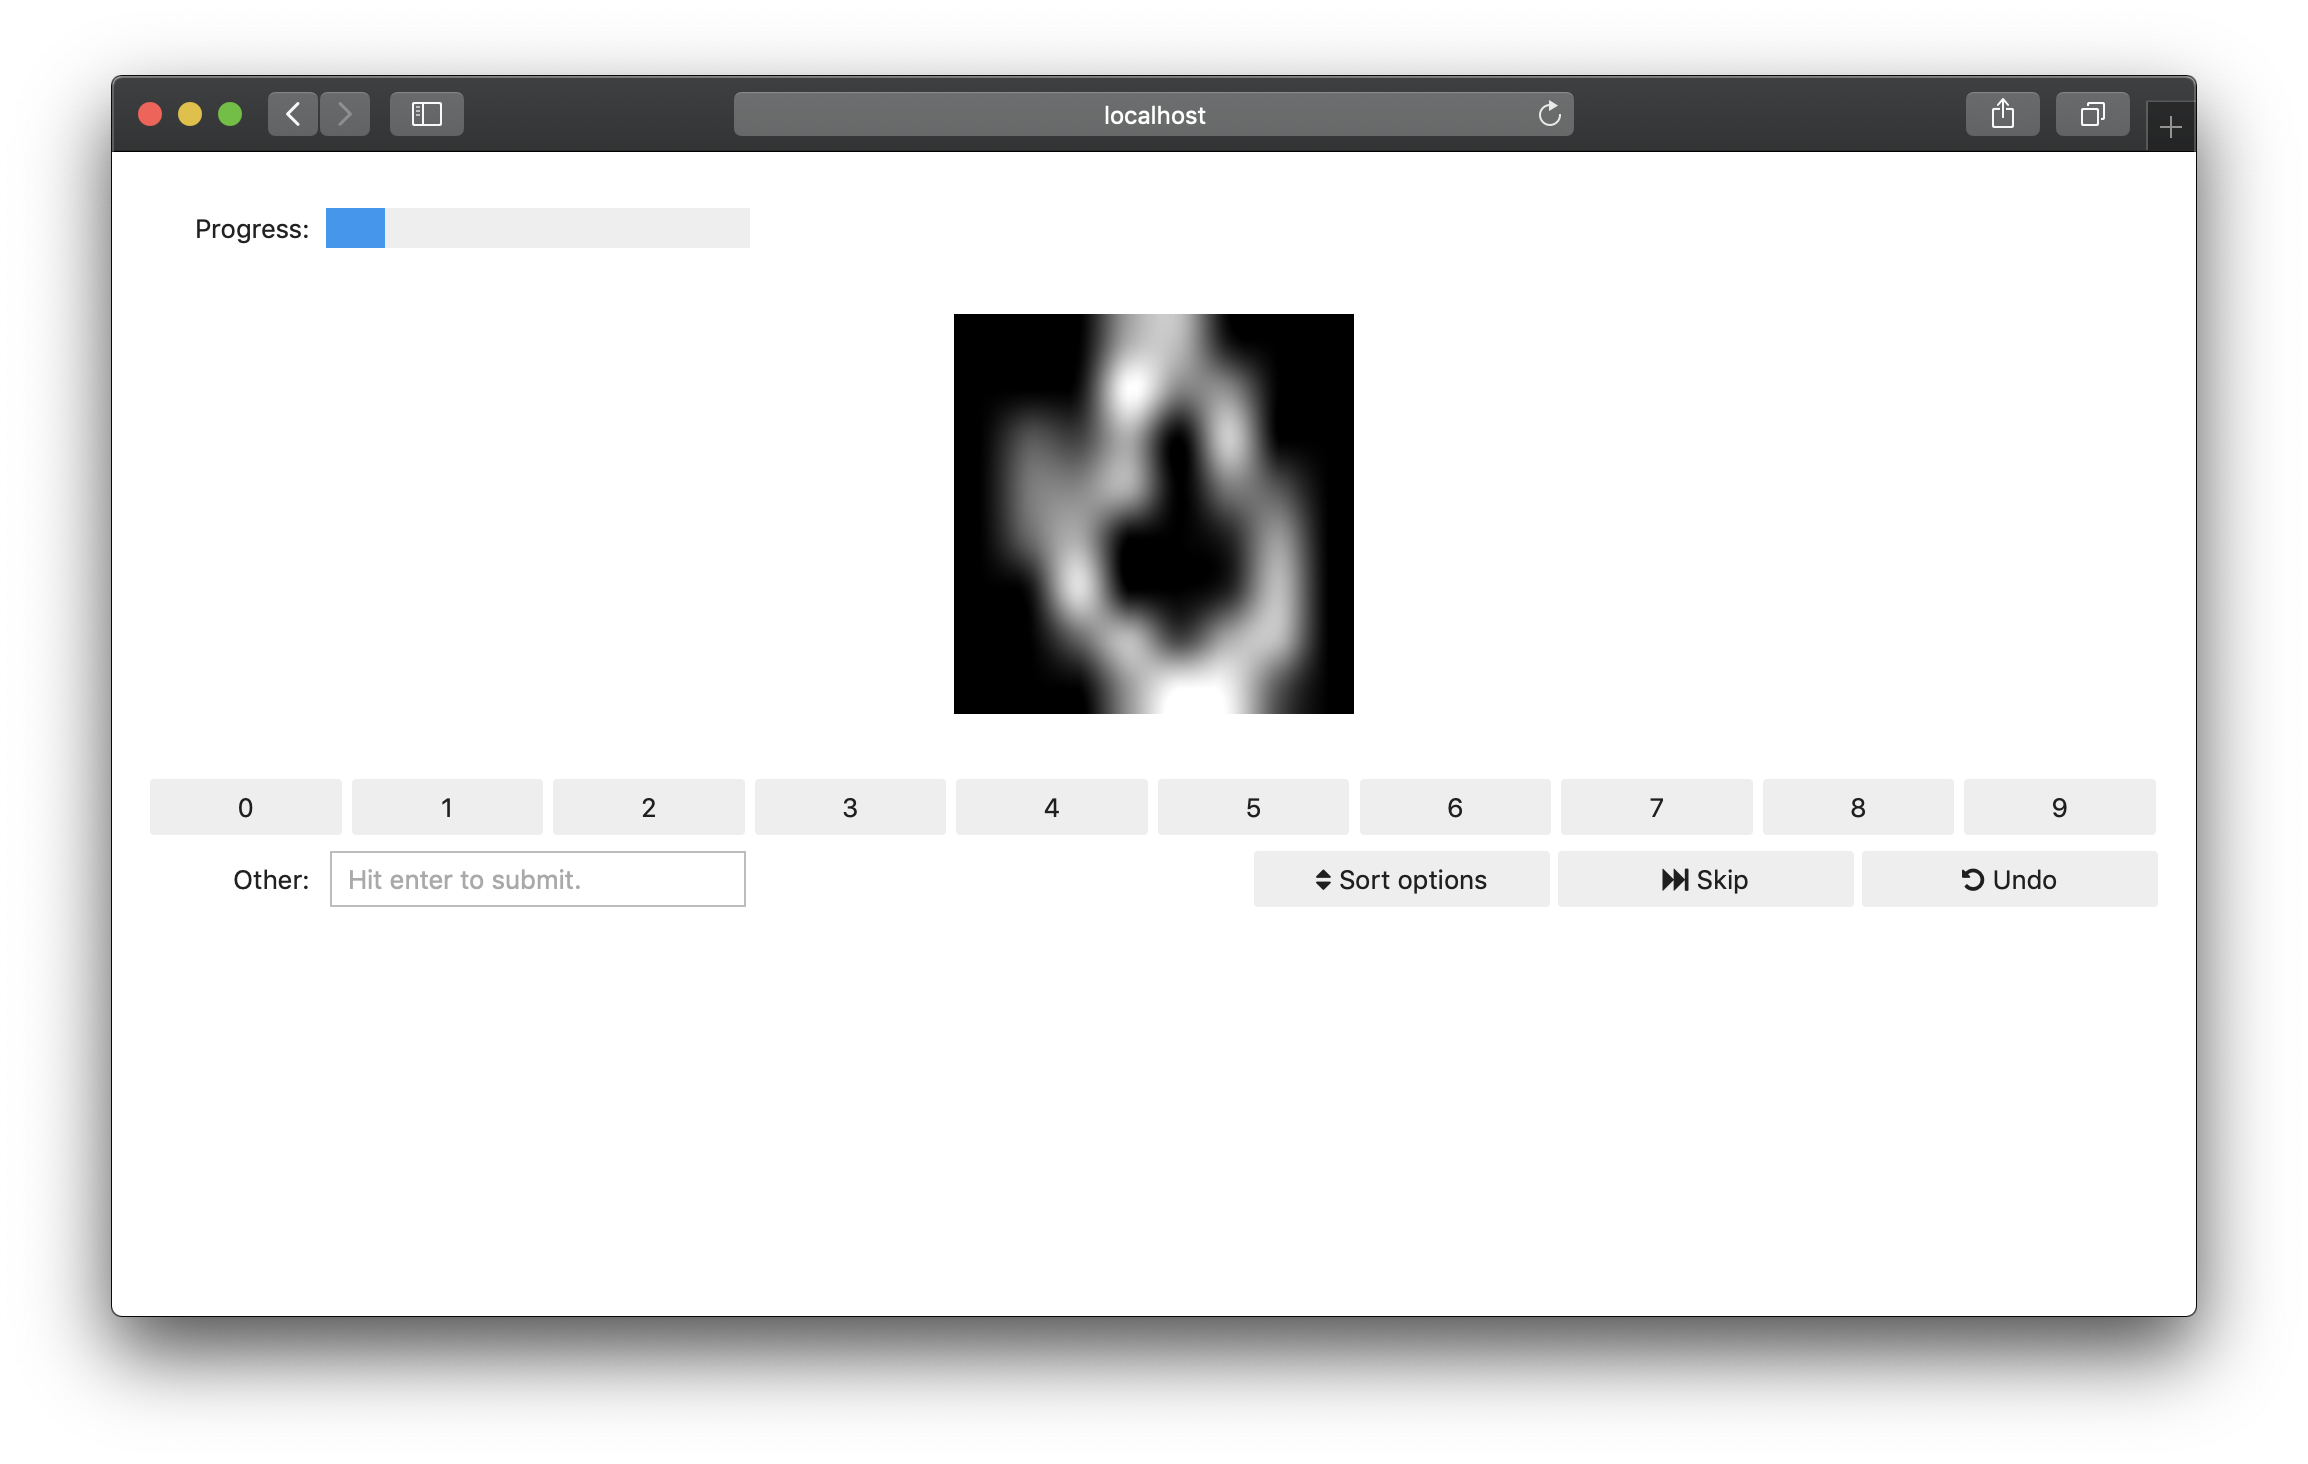
To make superintendent read from the database and display the images (we’ll be using MNIST again…), we need one file with the following content:
./voila-interface.ipynb
import os
from superintendent import Superintendent
from ipyannotations.images import ClassLabeller
from IPython import display

user = os.getenv('POSTGRES_USER', "superintendent")
pw = os.getenv('POSTGRES_PASSWORD', "superintendent")
db_name = os.getenv('POSTGRES_DB', "labelling")

db_string = f"postgresql+psycopg2://{user}:{pw}@localhost:5432/{db_name}"

input_widget = ClassLabeller(options=list(range(1, 10)) + [0], image_size=(100, 100))

widget = Superintendent(database_url=db_string, labelling_widget=input_widget)

display.display(widget)
The orchestration script (our machine learning model)
This script will look very similar to our notebook, but we will additionally create our machine learning model. This time, we will use a neural network, using keras.
import os
import time

import sqlalchemy
from sklearn.datasets import load_digits
from sklearn.model_selection import cross_val_score
from tensorflow import keras

from superintendent import Superintendent
from ipyannotations.images import ClassLabeller


def keras_model():
    model = keras.models.Sequential(
        [
            keras.layers.Conv2D(
                filters=8, kernel_size=3, activation="relu", input_shape=(8, 8, 1)
            ),
            keras.layers.MaxPool2D(2),
            keras.layers.Conv2D(filters=16, kernel_size=3, activation="relu"),
            keras.layers.GlobalMaxPooling2D(),
            keras.layers.Flatten(),
            keras.layers.Dense(10, activation="softmax"),
        ]
    )
    model.compile(keras.optimizers.Adam(), keras.losses.CategoricalCrossentropy())
    return model


def evaluate_keras(model, x, y):
    return cross_val_score(model, x, y, scoring="accuracy", cv=3)


def wait_for_db(db_string):
    database_up = False
    connection = sqlalchemy.create_engine(db_string)
    while not database_up:
        time.sleep(2)
        try:
            print("attempting connection...")
            connection.connect()
            database_up = True
            print("connected!")
        except sqlalchemy.exc.OperationalError:
            continue


model = keras.wrappers.scikit_learn.KerasClassifier(keras_model, epochs=5)

user = os.getenv("POSTGRES_USER")
pw = os.getenv("POSTGRES_PASSWORD")
db_name = os.getenv("POSTGRES_DB")

db_string = f"postgresql+psycopg2://{user}:{pw}@db:5432/{db_name}"

# wait some time, so that the DB has time to start up
wait_for_db(db_string)

# create our superintendent class:
input_widget = ClassLabeller(options=list(range(1, 10)) + [0], image_size=(100, 100))

widget = Superintendent(
    database_url=db_string,
    labelling_widget=input_widget,
    model=model,
    eval_method=evaluate_keras,
    acquisition_function="entropy",
    shuffle_prop=0.1,
    model_preprocess=lambda x, y: (x.reshape(-1, 8, 8, 1), y),
)

# if we've never added any data to this db, load it and add it:
if len(widget.queue) == 0:
    digit_data = load_digits().data
    widget.add_features(digit_data)

if __name__ == "__main__":
    # run orchestration every 30 seconds
    widget.orchestrate(interval_seconds=30, interval_n_labels=10)
Note
In this case, we are adding the data for the images straight into the
data-base. This means the numpy array is serialised using JSON. If your
images are large, this can be too much for the database. Instead, it’s
recommended that you only place the filepaths of the image into the
database.
Dockerfiles
Then, we need to actually build two docker images: one that will run the web application, and one that will run the orchestratrion:
Web application (voila) dockerfile
FROM continuumio/miniconda3:4.6.14-alpine

RUN /opt/conda/bin/pip install --upgrade pip

RUN mkdir /home/anaconda/app
WORKDIR /home/anaconda/app

# install some extra dependencies
RUN /opt/conda/bin/pip install voila>=0.1.2
RUN /opt/conda/bin/pip install ipyannotations
RUN /opt/conda/bin/pip install "superintendent>=0.6.0"

ENTRYPOINT ["/opt/conda/bin/voila", "--debug", "--VoilaConfiguration.extension_language_mapping={'.py':'python'}"]
CMD ["app.ipynb"]
Model training dockerfile
FROM tensorflow/tensorflow:2.10.0

RUN pip install "ipyannotations>=0.5.1"
RUN pip install "superintendent>=0.6.0"

RUN mkdir /app
WORKDIR /app

ENTRYPOINT ["python"]
CMD ["app.py"]
Starting
At this point, our folder structure should be:
.
├── docker-compose.yml
├── orchestrate.py
├── voila-interface.ipynb
├── tensorflow.Dockerfile
└── voila.Dockerfile
Now, we can run docker-compose up, which will:
build the docker images specified in docker-compose.yml
start the four different docker images
Now, if you visit http://localhost:8866, you will be able to start labelling. And, of course, if you do this on a web-server, you’ll be able to point other people to that address, so they can start labelling too.
As you and your colleagues proceed with the labelling, you can inspect the content of the database at http://localhost:8080, the “adminer” interface (a web interface to inspect databases). Make sure to set “System” to PostgreSQL when you log in.